
When you include forms on your website for user input, it is always advisable to perform some validation on the data entered. This not only ensures that your application receives the type of data it can work with, but it also makes for good UX (user experience) as users will be able to be warned of the incorrect input and be given hints of the kind of data that is acceptable.
There are two kinds of validation: client-side and server-side validation. It is recommended that you perform both. Client side validation is usually done with JavaScript and it serves to give the user quick feedback on input errors before a call to the server is made with the data. Server side validation serves as a second line of defence against invalid data. Even if you have set up client side validation, you should always perform server side validation as JavaScript can be bypassed.
In this tutorial, we’ll look at how client side validation can be done using jQuery. We’ll see two ways of doing this. First we’ll validate a form’s data by writing the validation rules from scratch and then in the second example, we’ll show how this process can be made easier by using the jQuery Validation Plugin.
If you want to see how you can validate your form quickly usingthe jQuery Form validation plugging, head straight to The Most Indispensable jQuery Form Validation Reference Guide
To get started, include jQuery in your HTML file.
<script src="https://cdnjs.cloudflare.com/ajax/libs/jquery/3.1.1/jquery.min.js"></script> Add the following form to the file.
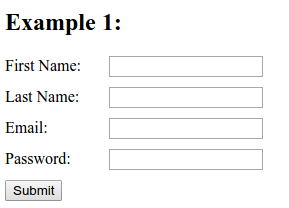
<!-- First Form --> <h2>Example 1:</h2> <form id="first_form" method="post" action=""> <div> <label for="first_name">First Name:</label> <input type="text" id="first_name" name="first_name"></input> </div> <div> <label for="last_name">Last Name:</label> <input type="text" id="last_name" name="last_name"></input> </div> <div> <label for="email">Email:</label> <input type="email" id="email" name="email"></input> </div> <div> <label for="password">Password:</label> <input type="password" id="password" name="password"></input> </div> <div> <input type="submit" value="Submit" /> </div> </form> The above markup is for a simple form with four fields and a submit button.
Add the following CSS styles.
form label { display: inline-block; width: 100px; } form div { margin-bottom: 10px; } .error { color: red; margin-left: 5px; } label.error { display: inline; } The resulting form can be seen below.
Add the following JavaScript code to the file.
$(document).ready(function() { $('#first_form').submit(function(e) { e.preventDefault(); var first_name = $('#first_name').val(); var last_name = $('#last_name').val(); var email = $('#email').val(); var password = $('#password').val(); $(".error").remove(); if (first_name.length < 1) { $('#first_name').after('<span class="error">This field is required</span>'); } if (last_name.length < 1) { $('#last_name').after('<span class="error">This field is required</span>'); } if (email.length < 1) { $('#email').after('<span class="error">This field is required</span>'); } else { var regEx = /^[A-Z0-9][A-Z0-9._%+-]{0,63}@(?:[A-Z0-9-]{1,63}\.){1,125}[A-Z]{2,63}$/; var validEmail = regEx.test(email); if (!validEmail) { $('#email').after('<span class="error">Enter a valid email</span>'); } } if (password.length < 8) { $('#password').after('<span class="error">Password must be at least 8 characters long</span>'); } }); }); In the above code, we set a listener on the form that will be called when it is submitted. In the listener, we first make a call to preventDefault() to prevent submission of the form’s data. We then create some variables and assign them the values of the different fields found in the form.
Ignore the $(".error").remove(); statement for now, we’ll get to it later.
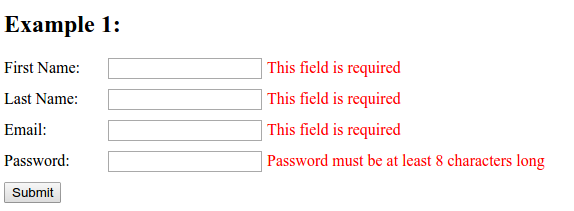
After getting the form’s field values, we run some tests on them to check whether they are valid or not. We check to see whether the first_name, last_name and email fields have input. If the user left a field blank, a span tag will be appended after the field with an error message.
We add another check for the email field ensuring that the value entered is a valid email address format. We use a regular expression for this check.
Finally we check the password length to ensure that it’s at least 8 characters long.
Before the code that validates the fields, you’ll find the statement $(".error").remove();. This removes any element with the error class from the documents. This ensures that on subsequent submissions, the form will not have the previous error messages. If we didn’t include this, then every time the form was submitted with errors, an error message would get appended on the previous error message, resulting in the form displaying multiple error messages.
Try submitting the form with invalid data and you should see the error messages.
Using the jQuery Validation Plugin
In the previous example, we wrote code that validated the forms data from scratch. To make this process faster and easier, you can use a library like the jQuery Validation Plugin. With this, you only have to specify a few rules for each field of your form that is to be validated, and the plugin will take care of validation for you.
To see this in action, first include the library in your file. Don’t remove the jQuery script tag as the plugin depends on jQuery.
<script src="https://cdn.jsdelivr.net/jquery.validation/1.16.0/jquery.validate.min.js"></script> Add another form to the file.
<!-- Second Form --> <h2>Example 2:</h2> <form id="second_form" method="post" action=""> <div> <label for="fname">First Name:</label> <input type="text" id="fname" name="fname"></input> </div> <div> <label for="lname">Last Name:</label> <input type="text" id="lname" name="lname"></input> </div> <div> <label for="user_email">Email:</label> <input type="email" id="user_email" name="user_email"></input> </div> <div> <label for="psword">Password:</label> <input type="password" id="psword" name="psword"></input> </div> <div> <input type="submit" value="Submit" /> </div> </form> And add the following JavaScript code inside the $(document).ready(function() {}) block, after the $('#first_form').submit(function(e) {}) block.
$('form[id="second_form"]').validate({ rules: { fname: 'required', lname: 'required', user_email: { required: true, email: true, }, psword: { required: true, minlength: 8, } }, messages: { fname: 'This field is required', lname: 'This field is required', user_email: 'Enter a valid email', psword: { minlength: 'Password must be at least 8 characters long' } }, submitHandler: function(form) { form.submit(); } }); We add the required rule to all fields of the form. For the email field, we add an email rule that will ensure the value entered is a valid email. The password field has an added rule that ensures its minimum length is 8 characters.
After specifying the rules, we set the error messages that will be shown whenever a rule fails.
Launch the page and test the form and you should still be able to get validation on the form fields.